Showing posts with label quilt. Show all posts

4.25.2012

Update on Hannah's Quilt

Hello All-

Well, if you have been reading my posts lately, you'll know that Hannah's quilt had to go on the back burner for a bit.  Well, now that my special blankets are done, I'm back to getting squares sewn up for Hannah's quilt. 

I'm doing a disappearing nine-patch pattern.  I was planning on making a twin sized quilt, but Hannah thinks that a crib sized one will be better for snuggling.  I guess I shouldn't complain at less work, right??

Sorry for the crappy photos.  The one up above won't turn, no matter how many times I try, and I noticed that the one to the left is blurry. Argh!!  Oh well, you get the point.  The squares aren't exactly in their final spots, but I was curious to see how they would look together. 

So, there you have it.  I made three large squares while Hannah was at school today, so a few more days like that and I'll be done in no time!!
Stay tuned for more updates!!

Happy Sewing!!
Sharon

4.20.2012

I Sew Made That!

Hello All-

I have been crafting up a storm these past few weeks.  I am just about done a knit baby blanket and last night I finished my second quilt!!  I'll eventually tell the story of where the quilt and knit blankets are going, but in the meantime, I couldn't wait to share finished photos of the quilt.

The pattern is called Urban Rose Quilt and I bought it as a pamphlet at Walmart.  One of the things I like about it is that it uses some pre-cut fabric to make it.  I am not the best when it comes to precision cuts, so having some of it done for me was helpful.  It uses one jelly roll and one 5-fabric bundle.  I used double-fold extra wide bias tape for the binding, and a mini-bolt for the backing.  All fabric was from Walmart. 

I decided to hand-tie this quilt for a few reasons.  One, I needed to finish it in a timely manner.  Two, I already knew how to hand-tie and felt comfortable with the method. And three, I like the look of using hand-ties when the quilt is mostly squares. 

I added the ties at the corners of each square and in the middle of each one.  Even after washing, only one knot started to loosen.  Not too bad!!

Because I went with mostly solids (there's a slight pattern to the fabrics), I decided to do something a bit funky on the back.  The fabric is done in coordinating polka dots, and though it isn't 100% straight, I think the dots hide that well.  Finally, I added a purple binding to pick up on the girly colors of the quilt. 

All in all, I was looking to make something that had a decent amount of work, while still being relatively quick.  I also wanted it to be a cheerful and bright blanket.  Something that makes you smile when you see it.  I don't know about you, but I am smiling, so I think my mission was accomplished!!

(Linked up to Crazy Mom Quilts: Finish it up Friday)
Happy Crafting!
Sharon

2.15.2012

15-Minute Bandanna Dress

Hey Everyone!!

So, I was playing with my sewing machine again today and I whipped up a little dress for Hannah.  I saw this tutorial for a bandanna dress posted on Pinterest and I had to give it a go.  As with Hannah's Busy Bag, I won't do a step by step on here since the tutorial is really detailed.  I just give you a few of my observations and suggestions.

First, when I went to Michaels, I wasn't sure if I needed a regular sized bandanna or the over sized one that they offered.  Hannah is in size 5-6 and a regular sized one was just fine.  A bit big actually.  The bandannas come in a variety of colors and only cost $2.99 a piece!!  I found some ribbon with a touch of bling on it for $1.99.  All in all, a cheap project!


Before I started, I ironed out all of my pieces.  I know I should have washed them first, but they need to be hand washed and I was in a hurry to get going.  Hannah won't be wearing the dress right away (I don't think), so I have plenty of time to wash it later.  One thing I noticed right away was that the bandannas were neither actual squares or the same size.  They were a touch off, but when I pinned them, I just made sure the bottom hem was even on both sides and pinned them appropriately.  I was originally going to square them off when I sewed, but then I realized that you would be able to see the off seam around the arms.  So, I simply pinned the edges evenly and forgot about the misshapen fabric.  Once the dress was on Hannah you couldn't even tell!!

All in all, this was a quick little project that took very little time to make.  Since my sewing machine is downstairs in the Dining Room and my iron is upstairs in my bedroom, I pinned and pressed everything in one step and then came down to sew all of it. 

Hannah loves her new dress!!  I will likely have to cut the ribbon a bit since it seems a bit long to me.  One tip regarding the ribbon...make sure you buy something that is not itchy.  I couldn't imagine using scratchy tulle or sheer ribbon...ouch!!


(Don't mind that she's modeling it over her school clothes!)

Before I go, I also wanted to give you all a preview of the quilt I started.  I am using a Disappearing Nine-Patch pattern, and this is the first Nine-Patch square I've made.  I still need to cut and reassemble it.  My local fabric shop doesn't sell pre-cut Charm Packs, so I had to match my own fabrics and cut them all by hand.  I bought a new straight edge today that should help speed things along, so hopefully this won't take me forever!  I'll post photos as I go along. 

Here's a close-up of the bug fabric that I used as my inspiration fabric. 

Happy Sewing!


Sharon

9.18.2011

Baby Knitting and a Big Announcement!!

Hello All-

So early yesterday morning, my big brother and my wonderful sister-in-law had a baby!!!  I am so happy for them and our Christmas trip home to New England cannot come fast enough!!!

In several posts, I mentioned that I was knitting some goodies that I couldn't share just yet.  Well, now that the little guy has arrived, I can share what I made for them.

First up is this little number I made to honor my brother's obsession with the Red Sox.  I call is "Little Slugger", and I used the Presto Chango pattern and did a stockinette panel.  Then I used a chart and duplicate stitched the "B".  I tried doing colorwork, but it ended up pulling too tightly and looked awful. 

I also made a second panel in moss stitch for the off-season. 

To match the set, I made a plain baby hat with the same moss stitch edge.  I think it all came out quite well.


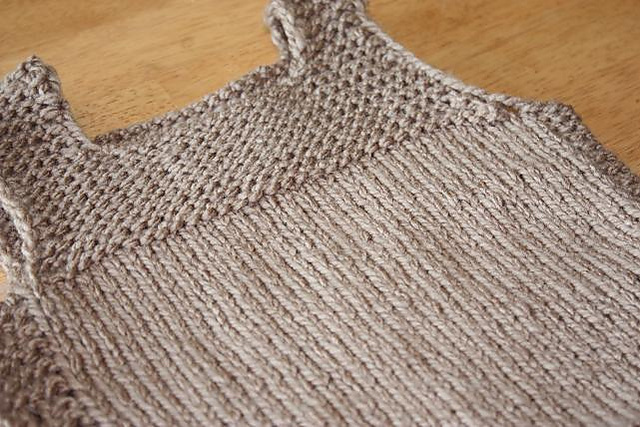
Next, I made this pullover that I call, Shades of Blue.  The yarn I used was Berroco Ultra Alpaca Tonal, and it knit like a dream!!!  I plan to use this same yarn for another project soon!!!

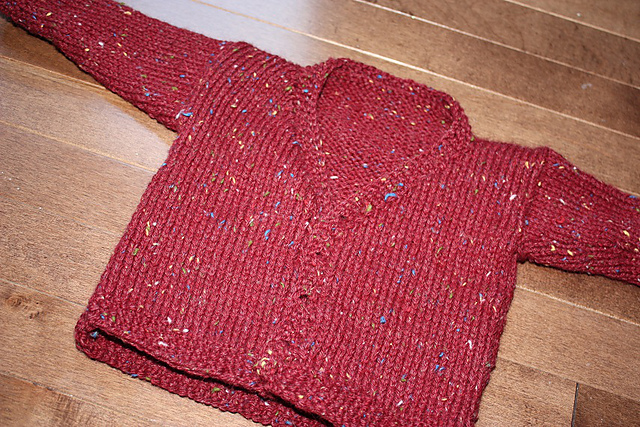
I thought this one was the cutest thing when I knit it up.  I have to see if I took any photos of it with the wooden buttons I put on it.  I have had the Cascade Yarns Lana D'oro Tweed in my stash for ages now and it has always screamed "Grandpa Sweater" to me.  So, that's what I made!!
These next two sweaters I made a while back and sent them to my brother when they first announced that they were expecting. 

I don't know why I love making mini versions of old man sweaters, but to me they are the cutest thing on baby boys!!
Finally, here's the project I am the most proud of.  Years ago I was given my Memere's prized sewing machine.  In an attempt to learn how to use it, I pieced together the top to a quilt, perfect for a baby boy.  I even had denim cut to size for the back.  The problem?  Once I got it pieced, I had no idea how to quilt it.  Fast forward to this summer.  My Mom visited us in Calgary, and I thought she might be able to show me how to finish the quilt so I could send it to my brother. 

We worked at it for a few days and sure enough, with my Mom's help, I learned how to tie and bind a quilt!!  This project means so much since there are three generations involved.  My brother and my Memere were always quite close, so I know that he appreciates the connection to her.
So there you have it.  A whole bunch of projects that were all made for Baby Tyler.  Welcome to the family little guy!!!

Happy Crafting!
Sharon

9.21.2009

Baby Goodies!!!


Meet Baxter...he's a friend of Burke Bunny. Baxter was my second go-around with the Susan Anderson Rabbit pattern. I made him as part of a baby shower gift for my friend Cara. I am so excited that her shower was this past weekend, since I have been chomping at the bit to post these photos...both on here and on Ravelry!!!

Hannah is as in love, if not more, with these bunnies as I am, so she has requested a purple one. I have the yarn already, but I think I am going to take a bit of a crafting break for a little while...keep reading and you'll see why!!


Also included in Cara's gift basket
was this little guy. I've named him Little Boy Blue, and he was created using the Presto Chango pattern.
I modified the pattern a bit, since the original had a lace pattern worked into the front panel. I thought it looked a bit to girly, so I stuck with a simple stockinette stitch one instead. I also added a little bear button to dress it up a bit.


This pattern is really cool because you can make multiple front panels for the same sweater. The entire thing unbuttons for easy clean-ups and changes. Pretty cool, huh?? Another bonus is that the entire thing (minus the panel) is made of one piece, so aside from some seaming (which I really don't mind doing), it takes no time at all to work up.
To go along with the sweater, I made a hat and a pair of booties. I am really happy with how everything turned out!!! Now I have to sit back and keep my fingers crossed that everything fits!!!

I wanted to dress up the gift tag a bit, so I personalized it and added some extra buttons and yarn. You never know when one might pop off!!!

So, I know that this is more of a knitting blog, but I made some sewn items for the basket and I didn't want to leave them out. I created this little tag-quilt out of some dog fabric I've had sitting around for a bit.

My finish work is far from professional, but I don't think it looks too bad!!!

And to match the mini-quilt, I made these three blocks. One has crinkle paper inside, one has bells, and the other makes a rattle noise. They were super easy to make and lots of fun!!!

Here's an artsy-fartsy photo of the finished basket!!

Last, but not least, here's the basket I made up from Hannah. None of it was handmade, but I thought it looked cute, so I wanted to include it.

So, that's it. Cara is really into handmade/recycled items, so I was pretty thrilled that my entire gift was handmade.

I was about to say that I am off to relax while Hannah is napping, but I realized that I have a knitting group on Wednesday and I have nothing on the needles...dang! I almost got away with having a craft-break. Oh well!!!

Have a great week everyone!!!

Cheers!
Sharon