Showing posts with label fresh from the oven. Show all posts

10.18.2011

Fresh from the Oven: Thanksgiving!

Hello All-

I'm in the process of writing some new food posts (since I have been cooking/baking up a storm lately).  In the meantime, I thought I would share the menu we used at Canadian Thanksgiving this past weekend.  All in all, I think the food was quite successful.  Since many of my readers will be celebrating US Thanksgiving next month, I thought I'd throw out some food ideas.  Stay tuned in the next week or so for more elaborate posts regarding some of the items we made.

The guests we had for Thanksgiving stayed with us two nights, so on top of dinner, I also had to think of breakfasts.  We went out for lunch both days, so that helped. 

Thanksgiving Dinner

Appetizers
Wild Mushroom Pate on Pita Chip Crackers
Manila Clams steamed in beer

Dinner
Lobsters (for the boys and Hannah)
Steaks (for the ladies)
Grilled Asparagus
Corn

Dessert
Baked Apples and Vanilla Ice Cream

Sunday

Breakfast

Lunch
Dim Sum at Cha for Tea Palace

Dinner
Lobster Rolls (for the boys)
Steak Subs with leftover steak, onions, and garlic mayo (for the girls)

Dessert

Monday

Breakfast

Lunch


So there you have it.  A bit unusual for a holiday weekend menu, but since none of us are big fans of turkey, we decided to go with something different.  The biggest hits of the weekend were probably the blueberry cake, the onions, and of course those who had the seafood were quite please with it too.

Have a great rest of the week!!!

Happy Cooking!!
Sharon

10.13.2011

Fresh from the Oven: Cream of Tomato Soup

Hello All-

With the changing of the leaves and a chill in the air, it is officially soup making time!!  I wanted to make something that would go nicely with the 5-Minute bread I made, so I started searching online.  I had recently had Cream of Tomato soup at our local sandwich shop, and it was heavenly, so that's the direction I decided to head in.

I stumbled across this recipe and it looked too easy not to try.  I used 2 pounds of on-the-vine tomatoes for my soup.  I used 7 or so small/medium ones, and that did the trick.  I probably could have gotten away with fewer beefsteak or another large tomato, but I wanted the sweetness of the smaller ones.  I also didn't want so much meaty-ness from the larger tomatoes.  Other than that, I stuck to the recipe.

I think the next time I will put the tomatoes through a sieve to remove the seeds (or cut them out before cooking).  Aside from some little pops from the seeds, it was super smooth, and so tasty with our Havarti and homemade bread grilled cheese sandwiches.  All in all, the perfect fall dinner!!

Happy Cooking!
Sharon

10.11.2011

Fresh from the Oven: 5-Minute Bread

Hello All-

This week has been misty and cold here in Edmonton, so what better to make than a loaf of bread?  Normally, I would have busted out my bread machine to make some perfectly shaped, perfectly baked loaf, but this time I wanted to try something new.  Despite all of my baking, I had never jumped into the world of making bread from scratch...and now was the time to do it!

Of course I put aside my numerous cookbooks and turned to my trusty buddy, Pinterest, to help me find the perfect recipe to try.  I wanted something relatively simple with not a lot of ingredients.  Much to my surprise, I found a recipe that fit both criteria!! 

The recipe for this magical bread can be found on the Heart, Hands, Home blog.  One of the best things about this dough is that it only uses four ingredients, flour, salt, yeast and water!!!!  I had everything on hand already, and when I saw how much flour it used, I ran over to Save-On Foods to grab some more (they had their unbleached flour on special this week...score!!!)  Another wonderful thing about the dough is that it keeps for up to 2 weeks in the fridge!  I was able to make a small loaf the other night as a trial run, and save the rest of the dough for Thanksgiving!! 

Once you get the dough all mixed, there is a separate post on the blog for the actual baking.  (Click here)  I was so excited that despite all of the unpacked boxes in the basement, I was able to find my pizza stone.  After making this bread, I can assure you that it won't end up on a basement shelf like it did at the old house.  It has been promoted to the baking cabinet!!  I need it handy for when I start craving bread!

The final product came out awesome!!  It was great straight out of the oven with some butter, and later in the week, we also used some of it to make grilled cheese sandwiches.  I can see using this same recipe for small dinner rolls, bread bowls, baguettes, you name it!!  I have a feeling that there will be a batch of dough waiting in the fridge from now on!!

Happy Baking!!
Sharon

10.03.2011

Fresh from the Oven: Pink Lemonade Confetti Cupcakes

Hello All-

The Diva and I have been baking again!!  This time we decided to make Pink Lemonade Confetti Cupcakes!!  Hannah and I were in the mood to bake, and after scouring Pinterest for something that looked yummy, she pointed out these pink treats.  How could I say no?

This recipe is super easy and I love that I can keep all of the ingredients in the pantry.  Hannah loved mixing the lemonade crystals and the water, as well as adding a layer of sprinkles to the top of each cupcake before they baked.  I loved that the recipe called for unsweetened applesauce and there was no super sugary frosting on top!!

These cupcakes lived up to their tangy description.  It really tastes like you're having a tall glass of lemonade when you bite into one.  I wasn't sure if Hannah would be upset that they were frosting free, but with the layer of sprinkles on top, she was satisfied.

I can definitely see us making these again in the future.  I think they would be a great addition to a birthday party or princess tea party as well.  I mean, what little princesses don't like eating pink food??  Mine was a fan!!

Happy Baking!
Sharon

9.28.2011

Fresh from the Oven: Homemade Cheese Crackers

This post was supposed to have run back in September and for some reason it bounced back as a draft and isn't on my blog anymore...I'm reposting for those who didn't see it the first time.


Hello All-
I've finally gotten settled in enough at the new house to start baking again.  First up, a recipe that I spotted on Pinterest.  It is for homemade cheese crackers, similar to Cheeze-its. 

These little crackers are super easy to make and so delicious!!  I did make a few changes to the original recipe, one on purpose and one accidentally.  The intentional change was that I backed off on the red pepper flakes that the recipe calls for.  I halved the amount, but in all honesty, I think I'll skip them all together next time.  If I were making these crackers for an adult party or as twists, I would keep the flakes in, but for snacking, I prefer them plain.  The mistake that I made on the recipe was so silly.  I had my butter softening and I forgot to put it in!  I wondered why my dough wasn't forming a ball, so I added a touch more milk.  That's when it hit me that my butter was sitting on the counter...d'oh!  I added the butter and sure enough, a dough ball formed.  The extra milk made the dough a bit sticky, but nothing that a few sprinkles of flour couldn't fix.

I do encourage you to use parchment paper when you make these crackers.  I was still frazzled by my butter mistake, so I forgot.  They didn't stick, but started to brown up a bit sooner than I would have liked.

I must say, these crackers are addicting!  All three of us were munching on them last night, and I have already had a few handfuls this morning.  I am waiting for the weather to cool down a touch so I can make some homemade soup and throw a few handfuls of crackers in!  I think they'll be super yummy served that way.  Hubby couldn't believe how similar they tasted in comparison to the store-brand crackers. 

All in all, this was a wonderful recipe and a hit in our house!  I think there will be many more batches being whipped up in the future!

Happy Baking!
Sharon

2.19.2011

Fresh From the Oven: Homemade Pasta

Hello All-

As I have said in other posts, my KitchenAid mixer is my best friend in the kitchen.  Despite the amount of use that it gets, I still didn't feel that I was using it at its full potential.  You see, we have some attachments for the mixer and I had never even taken them out of the box!!  One is a sausage stuffer, and since meats fall into hubby territory, he's responsible for dusting that off this summer. 

Another attachment we had was the food grinder/pasta maker.  I put aside the grinder attachment for now (that's going to get lots of use come St. Patrick's Day...I love me some hash!!) and I decided to take the plunge into pasta making.  The attachment that we have allows you to make noodles of various sizes and macaroni.  I decided to try egg noodles, since I had planned to make beef stroganoff for dinner tonight. 

I used the recipe that came with the attachments.  Pretty simple...eggs, flour and water.  It called for very little water, and I don't know if the altitude messed with tings or what, but I had to add quite a bit more water than it called for.  Honestly, I wish I had added more. 

Once I got it balled up and resting, I tackled putting the extruder on the mixer.  It was quite straightforward and not hard at all.  So far so good.

I had read on several websites that pasta making takes lots of practice and I now believe it.  My first few tries were rippled and short.  Oh well...those became the testers...aka lunch!  After a few tries, I got the hang of things.  The problem I ran into was finding room to lay out all of the pasta.  I guess I could have lined the kitchen table with towels, but I didn't know how long it would take to dry.  So, I used a method I read about online where you stretch a broom across two chairs and dangle the pasta over it (on towels of course).  This worked, but I found that when I removed the pasta, much of it cracked at the bend point.  I guess this isn't a big deal if you are cooking it right away. 
For pasta that is going to be stored, I found that simply lying the noodles on a lightly floured cookie sheet worked well.  The noodles stayed flat and would be easier to store.

In the end, I am quite happy with the results.  Hannah and I tried some of the "testers" for lunch and they were yummy!!!  I cannot wait to cook up the rest tonight.

My next adventure is going to be with ravioli making.  Hubby and I went out last night to find some supplies and we couldn't find any!!  All we found was some pasta flour and a fluted edge roller.  I did some digging online and found that Sur La Table has a huge selection of pasta making supplies...and though they aren't located in Canada, they are in Florida near my in-law's house, so I know where I'll be shopping on our upcoming vacation!!

Stay tuned...

Cheers!
Sharon

2.17.2011

Fresh from the Oven: Apple Galette

Hello All-

As you may have read in my previous post, hubby and I recently went to see Chef Eric Ripert at the EPCOR Centre here in Calgary.  In preparation for the show, we purchased Chef Ripert`s cookbook, Avec Eric.  In it are stories, photos, and of course, 100+ recipes. 


Letting the caramel cool on the silicone sheet

One that caught my eye was the Apple Galette (page 256).  I am by no means a pastry chef, but I do feel much more comfortable baking puff pastry than grilling meat.  Thankfully, hubby loves to cook, so he is always on meat duty. 


The sugar/cinnamon/vanilla powder pre-baking

I had been waiting for the perfect time to try out this recipe, and when we decided to invite some friends over for dinner, I jumped at the chance to make it.  Little did I know that it would involve being in the kitchen all day long!!


Post baking
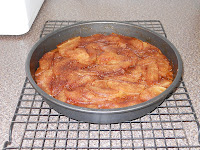
The recipe is actually quite simple: make caramel, use caramel to make sugar coating, slice apples, bake apples with sugar coating, and bake again in a puff pastry.  The trouble with this recipe is the length of time that it takes to make it.  Each step much be cooked/baked and then cooled, before you can move on.  Had I read more carefully, I would have made this a day ahead and done the final baking on the day of the dinner party.


Final product- yummy!!
 All in all, it was delicious.  The puff pastry didn`t come out exactly as planned, since I forgot to thaw it to unroll it and then refreeze it.  I think next time I`ll look to see if I can find flat sheets, rather than rolled ones.  I think that would make life much easier.  I also plan to use a different type of apple next time.  The recipe calls for Granny Smiths, and I found that they were a bit too tart for the recipe.  That could be the fault of the season, but I think I`ll go with something sweeter next time.  This was easily remedied with a dollop of vanilla ice cream...homemade whipped cream would likely do the trick as well. 

I highly recommend this recipe to anyone who is looking to wow their guests.  with a bit of tweaking to one`s tastes, it can easily be a show-stopper!!!

Cheers!
Sharon

1.23.2011

Fresh from the Oven: Must Have Baking Tools

Hello All!!!

With all of my recent food posts, I thought I would share some of my favorite tools in the kitchen.  First up, the baking tools.  I went through my cabinets and found a few items that I cannot function without.  I'm sure there are more things that should be listed, but these are the first ones that came to mind.  (I am providing links the Amazon pages that I could find for these items...though many of them can be bought at any kitchen supply store)

First up, my Silicone Zone mat.  I have never liked silicone baking pans, but this mat is a must!  My Sister-in-law bought it for me years ago, and I use it on a weekly basis.  I use mine mostly for rolling out dough, and not for actual baking in the oven.  I also use my Memere's old Tupperware mat (you know, the one with the pie crust sizes on it), but the downside to that mat is that it rolls for storage and tends to curl when I am using it.  This silicone mat grips my counter top perfectly and is just the right size for the projects I do.

If there is one item sold on television commercials that is worth trying, it is the Ove Glove!!  Our Aunt bought these for us a few years ago for Christmas, and as you can see from the photo, they are well worn!!  I find regular potholders to be clumsy and difficult to work with.  These gloves are awesome!  Occasionally we feel heat come through the gloves, but it is usually when we are dealing with hot meat pans, and there's no doubt in my mind that a pot holder would have failed much sooner.  As someone who has put these through the ringer, I suggest you get yourself a pair...they typically come one to a package, but are well worth buying two!

Oh Parchment Paper...how do I love thee?!  I'll be honest, I never used to use parchment paper.  To me, it was one more expense on the grocery bill that I didn't see a need for.  Instead, I wasted a lot of money on burnt cookies, and dish soap used to scrub baked on food off of my baking sheets.  Finally, after a batch of hockey pucks burnt Whoopie Pies, I gave in and bought myself a roll.  Now, it is truly my best friend in the kitchen.  I always line my baking pans with it, whether I am baking cookies, heating up chicken nuggets, or making some dish that involves oozing cheese.  I also find myself grabbing it when I do small craft projects with Hannah.  All in all, this is a winner in my book!!


If you watch Good Eats with Alton Brown, you've likely seen a Metric Wonder Cup (or something just like it) before.  I say that because that's where we first became introduced to this kitchen life-saver!  When my husband bought one at a local kitchen supply store, I thought it was a waste of money...WRONG!!!  This little guy has saved me so many times in the kitchen.  What is so amazing about it?  Have you ever tried to get molasses out of a measuring cup, or honey, or syrup?  Not fun, right?  How about when you measure mayo or shortening, only to find that there was an air bubble in the cup and you don't know how much you really measured out?  This little gadget solves all of those problems.  You pull the two pieces apart until they line up at the amount you need.  Then you add your ingredients to the top, and push the yellow part like a plunger to add your ingredients to your mixing bowl.  The top of the yellow portion is flat, so you can scrape it off with a spatula and you haven't missed any of the ingredient you're working with.  It is genius!!  The pieces then come apart, so you can wash them easily.  So handy!!

If you have a Kitchen-Aid mixer, then you can stop reading here.  You don't need to hear me go on and on about how wonderful this item is...you already know it!!  For those who have never felt the power of a Kitchen-Aid...oh man, are you missing out!!  As a child, my Mom had a Sunbeam mixer that she used daily.  It had a bowl that spun, and the smell...how do I describe it?  Burnt motor perhaps?  My Mom used her mixer so much that I think it could rival Jillian Michaels in a workout!  Then she discovered Kitchen-Aid, and has turned all of us into converts along the way. 

My Mom bought me my mixer as a wedding present, and I am so thankful!!  These bad boys aren't cheap, but once you use one, you'll know that they are worth every penny!!  Mine is a Professional model, though they come in all sorts of price points, sizes, colors, and styles.  Personally, I like the drop bowl, rather than the tilting head, so that narrows down the model options.  With all of the available attachments, there isn't much this mixer can't do.  Stay tuned to the blog this summer, when we put ours to the test and make sausage...then we're going to smoke it in hubby's smoker...mmmm...I'm salivating at the thought!!!

Finally, the gadget that I cannot bake without is my telephone.  Oh, and the speed-dial preset that calls my Mom.  She is the reason why I bake, and she has bailed me out of so many culinary blunders over the years!  I love going home for the holidays and baking with her.  I always learn so much and we have so much fun!!  Many of my best recipes come from her, and I am so grateful!!!

So, there you have it, my Must-Have list of baking tools.  Feel free to comment with any of your favorites, as I am always looking for new gadgets to try out!!

Cheers and Happy Baking!
Sharon

1.20.2011

Fresh from the Oven: Cinnamon Spirals

Hello All-

Ready for some more kitchen "stuff"?  I made some awesome cookies this week, and I wanted to share the recipe and some pointers with you all.  The recipe is for Cinnamon Spirals, and it comes from the Robin Hood Flour website.

This recipe is proof of why you should always read your recipe before starting to bake.  The first step is to preheat your oven...okay, that's pretty common to see as step one.  The problem is that these are refrigerator cookies, and you don't bake them for at least another few hours, if not the next day! 

Skipping Step One and moving right along, it is all pretty straightforward.  The actual dough is easy to prepare, and the filling is too.  The trouble I had was with the rolling out of the dough and the rolling of the combined dough and filling into a jellyroll shape.  I used parchment paper to roll the dough out on, and I found that the creases it made in the dough caused everything to split once it was jellyroll time.  So, be sure that you don't have any impressions in your dough after you roll it out.  Also, my kitchen tends to be warmer than most (due to ridiculously hot lighting fixtures), so I found that my dough was not rolling nicely for me.  Be sure to keep everything as cold as possible, and I think you'll have better luck.

The recipe says that you can chill your plastic wrapped jelly rolls for up to 24 hours.  This is what I did.  Again, I wanted things to be as cold as possible when it was time to slice.  I also only removed one roll at a time from the fridge so the other one wouldn't warm up too quickly. 

As you can see from the top photo, these little darlings sliced up really well.  Make sure your knife is nice and sharp and you'll be good to go.  I found that cutting straight down worked best, rather than slicing it like bread.  The one time I moved the knife, the roll started to come undone. 

I went a bit thick on my cookies, because...well...do I really need a reason??  Thirteen minutes in the oven was just enough to get them golden brown.

My first attempt yielded 4 dozen-ish.  In all honesty, I have about 3 dozen presentable cookies and 1 dozen "tasters."  The website says that these freeze well, but I don't think they'll last long in my house. 

All in all, these are great, and I'll be making them again...and again...and again!  They have a similar taste to a family favorite that my Mom makes.  When we were little, she would take any leftover pie crust pieces, roll them out, fill with brown sugar, cinnamon and pats of butter, and fold it all up.  Vent the top with some fork pricks, bake at 325 until golden brown, and once cooled, slice into bars.  She always called them "Pets", but we always called them yummy!!! 

Happy Baking!
Sharon