Showing posts with label sewing. Show all posts

6.02.2012

Oh Me, Oh My...I've Been Busy!!

Hello All-

My apologies for the lack of posts lately.  I have been so busy that at the end of the day, I just want to crash!!  Along with a trip to Calgary, a cold that knocked me on my butt for a few days, and trying to get my garden going, I have been knitting up a storm!!

Rather than bore you with a long post, here are the photos...

First, in my blogging hiatus, I worked on 5 (yes 5!) WCOBBS blankets.


Tulip Time- I did the top white garter stitch stripe.


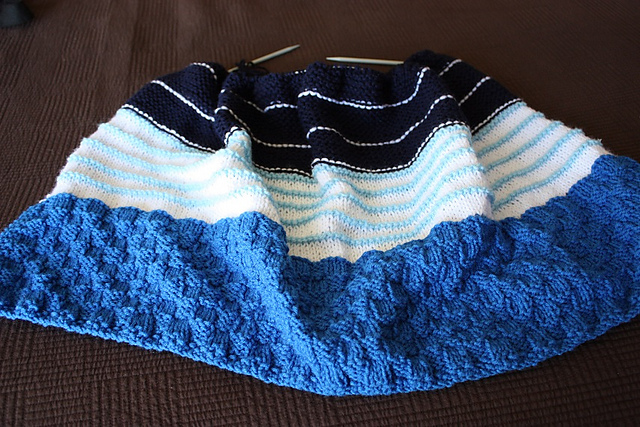
Ocean Breeze- I did the navy and white stripe on the top.

 
The Board Members all started blankets to see who could assemble a team to finish a blanket first...this was the beginning of my team's blanket.

 
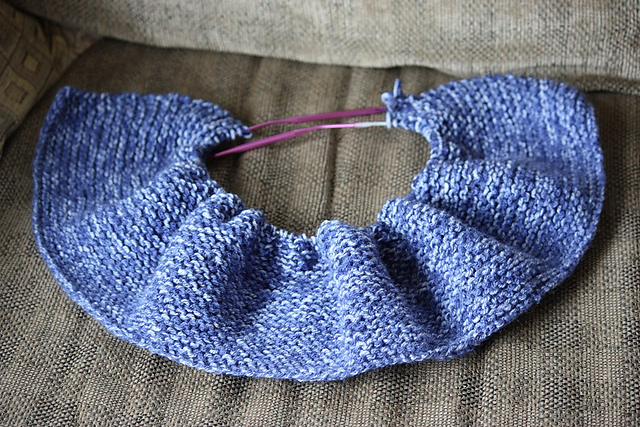
I started a "Mystery Blanket" that will get named by the person who adds the final border. 

And finally, I started a blanket called The Garden.

So there you have it...5 blankets in a short period of time.  I don't usually abuse my hands so much, but you'll see that I only did garter stitch stripes, so it wasn't too bad on my joints.  Most of my knitting took place while sitting in the car waiting for Hannah to get out of school.

As usual, my "ham" is doing what she does best for the camera!!


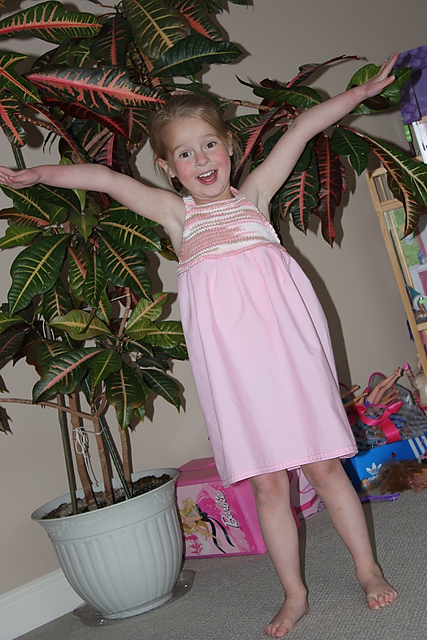
Speaking of Hannah, she got some handmade goodies as well.  I named this dress Summer Sundae, since the colors are that of chocolate, strawberry and vanilla ice cream.  The top is knit with cotton, and the bottom is fabric.  Sewing them together was a bit tricky, but not that hard. 

The straps on this dress are fully adjustable, so I'm sure she'll get quite a bit of wear out of it.
Finally, I made a summer hat for a friend's child who had an accident a few weeks back.  he had his head operated on, so Sarah wanted something to cover his head until his hair grew back.  So, here's my model doing her thing again with Desmond's Hat. 

I must say, she looks pretty cute in it, so another one may be on the needles before too long.

So, there you have it.  Along with all of these projects, I have a scarf on the needles and yarn bought for a few larger sweater projects.  I'm also plugging away at Hannah's quilt and a few other sewing projects.

Stay tuned and I'll be posting a preview of this year's garden.

Cheers!
Sharon

4.20.2012

I Sew Made That!

Hello All-

I have been crafting up a storm these past few weeks.  I am just about done a knit baby blanket and last night I finished my second quilt!!  I'll eventually tell the story of where the quilt and knit blankets are going, but in the meantime, I couldn't wait to share finished photos of the quilt.

The pattern is called Urban Rose Quilt and I bought it as a pamphlet at Walmart.  One of the things I like about it is that it uses some pre-cut fabric to make it.  I am not the best when it comes to precision cuts, so having some of it done for me was helpful.  It uses one jelly roll and one 5-fabric bundle.  I used double-fold extra wide bias tape for the binding, and a mini-bolt for the backing.  All fabric was from Walmart. 

I decided to hand-tie this quilt for a few reasons.  One, I needed to finish it in a timely manner.  Two, I already knew how to hand-tie and felt comfortable with the method. And three, I like the look of using hand-ties when the quilt is mostly squares. 

I added the ties at the corners of each square and in the middle of each one.  Even after washing, only one knot started to loosen.  Not too bad!!

Because I went with mostly solids (there's a slight pattern to the fabrics), I decided to do something a bit funky on the back.  The fabric is done in coordinating polka dots, and though it isn't 100% straight, I think the dots hide that well.  Finally, I added a purple binding to pick up on the girly colors of the quilt. 

All in all, I was looking to make something that had a decent amount of work, while still being relatively quick.  I also wanted it to be a cheerful and bright blanket.  Something that makes you smile when you see it.  I don't know about you, but I am smiling, so I think my mission was accomplished!!

(Linked up to Crazy Mom Quilts: Finish it up Friday)
Happy Crafting!
Sharon

3.20.2012

Sewing into Spring

Hey Everyone!!

Thanks for sticking with me through my little break.  We did indeed have to put Ella down, and life around here will never be the same.  We're getting on, but it is still much quieter and lonelier without my pretty lady.

Anyways, moving on to happier things, I've been sewing again.  Hannah loves skirts and I wanted to try making her some.  So, last night we went through my fabric stash and she picked out some purple retro fabric that I had leftover from her photo book.  Though the pattern is crazy busy, my little fashionista loved it and thought it would be just perfect for a new skirt. 

The pattern I used was from MADE, and you can find the tutorial here.  I've had the link pinned for ages on my "I Sew Can Make That" board, and I figured it was time to add it to the done pile.  It was super easy, and the directions were very detailed and easy to follow.  I found that my measurements were a touch off, since it sits a bit low on Hannah's hips, but I have a few ideas on how I can tighten things up a bit. 

If you're looking for a super quick project (mine took less than 45 minutes) to make for your little one, I highly suggest giving this skirt a go.  The tutorial also explains how to do a tiered skirt, and how to customize yours with lace, etc.  I see many more of these skirts in Hannah's future!!

Enjoy!!

Happy Sewing!
Sharon

2.15.2012

15-Minute Bandanna Dress

Hey Everyone!!

So, I was playing with my sewing machine again today and I whipped up a little dress for Hannah.  I saw this tutorial for a bandanna dress posted on Pinterest and I had to give it a go.  As with Hannah's Busy Bag, I won't do a step by step on here since the tutorial is really detailed.  I just give you a few of my observations and suggestions.

First, when I went to Michaels, I wasn't sure if I needed a regular sized bandanna or the over sized one that they offered.  Hannah is in size 5-6 and a regular sized one was just fine.  A bit big actually.  The bandannas come in a variety of colors and only cost $2.99 a piece!!  I found some ribbon with a touch of bling on it for $1.99.  All in all, a cheap project!


Before I started, I ironed out all of my pieces.  I know I should have washed them first, but they need to be hand washed and I was in a hurry to get going.  Hannah won't be wearing the dress right away (I don't think), so I have plenty of time to wash it later.  One thing I noticed right away was that the bandannas were neither actual squares or the same size.  They were a touch off, but when I pinned them, I just made sure the bottom hem was even on both sides and pinned them appropriately.  I was originally going to square them off when I sewed, but then I realized that you would be able to see the off seam around the arms.  So, I simply pinned the edges evenly and forgot about the misshapen fabric.  Once the dress was on Hannah you couldn't even tell!!

All in all, this was a quick little project that took very little time to make.  Since my sewing machine is downstairs in the Dining Room and my iron is upstairs in my bedroom, I pinned and pressed everything in one step and then came down to sew all of it. 

Hannah loves her new dress!!  I will likely have to cut the ribbon a bit since it seems a bit long to me.  One tip regarding the ribbon...make sure you buy something that is not itchy.  I couldn't imagine using scratchy tulle or sheer ribbon...ouch!!


(Don't mind that she's modeling it over her school clothes!)

Before I go, I also wanted to give you all a preview of the quilt I started.  I am using a Disappearing Nine-Patch pattern, and this is the first Nine-Patch square I've made.  I still need to cut and reassemble it.  My local fabric shop doesn't sell pre-cut Charm Packs, so I had to match my own fabrics and cut them all by hand.  I bought a new straight edge today that should help speed things along, so hopefully this won't take me forever!  I'll post photos as I go along. 

Here's a close-up of the bug fabric that I used as my inspiration fabric. 

Happy Sewing!


Sharon

2.13.2012

Hannah's Busy Bag

Hey Everyone!!

I wanted to share a quick project that I made this weekend for my Diva. She is always asking to bring toys of some sort with her when we go out to dinner, and I never had a small bag to hold everything. Needless to say, my purse had become a bottomless pit of toys and I was bound and determined to put a stop to it.

Cue Pinterest and a tutorial for a cute patchwork bag. It seemed like the perfect size for Hannah's goodies, so I thought I'd give it a try. (We named it the “BusyBag” since it was designed to hold stuff that would keep her “busy” when we go out!)


Since the tutorial is so wonderfully written, I won't comment too much on the actual construction of the bag, just a few things I found out along the way. First,for the squares...I had some jelly roll strips kicking around in the perfect Diva color, so I started there. They were already 2.5-inches wide, so I cut them into a bunch of squares. So simple!!

Next, I had Hannah help me lay the squares out into the pattern that she liked. I did this for a few reasons. One, if she was "part" of the project, she would busy herself long enough to see it finished. Second, it's her bag; it should be how she likes it, right??

I had some coordinating liner fabric (be sure to pick a good fabric...the bag is reversible!!) , so she picked the one she liked best and went off to play Barbies for a bit.

Sewing all of the squares too abit of time since I’m a beginner sewer, but the tutorial walked me through every step, including which direction to press seams, etc. 

All in all, the bag was quite easy to make.  When it came time to turn it right-side out through the hole I left, I decided to machine stitch across the bottom edge, rather than hand stitch it. I knew that Hannah would be stuffing it to the gills so I wanted it to be sturdy.  Also, the drawstring cording has started to fray, so I might be changing that out soon. 

The whole project took less than two hours and has already gotten a lot of use. The best part is that it can be easily sized up or down depending on your needs. 

I see myself making many more of these in the future!!  I bought some fabric with sheep knitting on it the other day, and I can see lots of knitting project bags being made with it!!

Happy Sewing!!
Sharon

P.S. Sorry for the poor quality photos from my phone.  I forgot to bust out my good one while I was making the bag.

1.13.2012

Cuz Everybody Needs a Pillow...Case

Hey Everyone!!

Well, I think I'm about belly deep in the sewing pool.  Tonight I made Hannah a pillow case for her body pillow.  It isn't anything fancy, but she loves it!!!  I bought two meters of Tiana fabric for 70% off at FabricLand yesterday (it ended up being $4ish per meter), and I knew exactly what I wanted to make with it.  Hannah has had a body pillow on her bed for a while now, but we were having an awful time finding a case for it.  Some stores sell pillow cases, but they are blah colors or you have to buy a bedding set to get a fun print one.  I had been hesitant to let her use the pillow too much until I had an easy way to wash it, so a cover was a must!

To make the case, it was pretty simple.  I measured the pillow at 20x48-inches.  Thankfully when my fabric was folded in half, it was 22-inches, so I only had to cut the length.  I cut the fabric at 55-inches to make sure that I had plenty for seams, etc. 

Next, I picked which end would be the open end, and I folded it over an inch or so, and then over again, about an inch or so.  This not only squared up the end, but it would also hide the raw edge after I sewed it. 

Once the folds were done (you could iron it if you wanted to), I sewed a fancy seam to seal in the edge and finish it off nicely.  Yes, I know the thread doesn't match the fabric the way it should, but Hannah liked that it matched Tiana's hair, and since the black was already loaded in my machine, who was I to argue??

Next, I matched up the long edge of the fabric and sewed it using a simple straight stitch.  I gave it about a 1/2-inch allowance (actually, I used the printed edge as a guide).  Finally, I matched up the bottom edges and sewed them closed.  I found that the fabric had been cut very crooked at the store, so I had to make sure that I made the stitches far enough in to square off the finished product.

As you can see, Hannah is a very happy customer!!  I have a bit of fabric left, so I might mix it with some other stuff I have an make Hannah a regular pillowcase to match.  We shall see...

Happy Sewing!

Cheers!
Sharon

1.11.2012

Getting My Feet Wet

Hello All-

Well, I managed to dig out my sewing machine this week.  It's funny, sewing both excites me and scares the crap out of me!  I don't know why, but I get so nervous to begin any sewing project.  I tried to jump right in and make some gift bags for the ornaments Hannah picked out for her teachers. 

I must say, I wasn't very "technical" when I made these bags.  I measured by eye, didn't iron the fabric and I can't even say that my lines were straight.  Despite this, Hannah's teachers told her that they were impressed...woohoo!!!

So, here they are...three bags for three amazing teachers!!

Next time, I will double my edges over to prevent fraying, and I will likely add a drawstring.  I was running short on time, so I simply made bags and tied them with ribbon. 

I hope to make more of these in the future.  They are just as quick as going to the basement for a paper gift bag, and if made correctly, they can be reused over and over again.  Plus, it shows that the gift giver took a few extra minutes to make something special for the recipient. 

So, now that I have my sewing feet wet, what should I tackle next?

Stay tuned to see what I have up my sleeve...or should I say, pant leg?

Cheers!
Sharon

5.03.2010

Hannah's Family Book

Hello All!

A while back I had mentioned that I was going to make the Diva a Family Book to take with her when she has surgery. I had intended to make a tutorial for the book, but I can’t find the photos I took while I was making it. All I seem to have are the photos I took today of the finished book. Hmmm…if I find them, I’ll be sure to make a tutorial.

So, my sewing skills…oh, my sewing skills. Needless to say, they aren’t very good. But, I trudged through this project, since I knew it would mean a lot to the Diva. While doing this, I kept thinking, “there must be 100 easier ways to do this” but, the end product is all that matters, right??

Included in the book are the Diva's Grandparents, Great-Grandparents, Aunts, Uncles, Cousins, and of course...her kitties. 

She picked out the fabric...purple of course!  And she helped decide which decorative buttons, etc we used on each page.  I used batting in between the pages so they are slightly stuffed, and I printed the photos on printable fabric. 


I then trimmed them out with ribbon (and learned the hard way that a glue gun will ALWAYS do a better job than the iron on bond stuff), and stitched the pages all together.  I used a piece of scrap ribbon and velcro to make a fastener to keep the book closed.
Like I said before, I am sure that there are 100 different ways that this book could have been done, but I am happy with the end result.  The Diva loves it too. 


My reasoning behind making the book is that only one set of Grandparents is going to make it up for Hannah's surgery.  The rest of the family lives 3000 miles away, so I thought I would try to find a way to bring the family here to be with her when she is recovering. 

Hannah loves to talk about her family, and I am hoping that if she gets nudgy or overwhelmed by all of the nurses and doctors around her, that she not only knows that her family is there with her, but it also gives her something to talk to all of the "strangers" about. 

I had originally looked into getting a small photo album instead, but with the softness of this book, she can snuggle with it and we don't have to worry about it bumping her when she is sleeping. 

I will keep looking for the photos of the step-by-step process I used...in the meantime, if you have any questions about how I made it, just ask!!

By the way, I am linking up this project to these sites:


DIY Day @ ASPTL
Creations by Kara

Cheers!
Sharon

12.05.2009

Me and my bright ideas

Hello All!!!
Happy December!!!
Sorry I haven't posted much lately. Life has been a bit crazy around here. Last week the hubby was out of town and I had a friend visiting, and this past week we were in the hospital with the little one. I did manage to start a sweater for her, and I promise that once I get a bit more into it, I will post photos.
Today I am writing about a new idea I had when Hannah was in the hospital. I know that many of my readers are fellow charity crafters, so I thought you'd be a good group to run this by. Please just virtually promise me that you won't run off with my idea and claim it as your own!!
So, with that said, while Hannah was in the hospital, she was miserable in hospital jammies. She begged to wear her own, but couldn't because she was hooked up to several monitors, IVs, BP cuffs, etc. When she was a baby, this was easily fixed by putting her in snap up jammies...the wires, etc could sneak out between the snaps. Unfortunately, this isn't so simple for an older child. So, she had to wear that nasty blue-green hospital gown that rode up every time she rolled over. So, while trying to calm her down, I wondered how I could modify regular jammies so they were more hospital friendly. The next time Hannah goes in, she'll be there for more than a week...and I don't feel like fighting the jammie battle with her again.
What I came up with was to make things like pants that are made of two separate pieces of fabric and then held together with snap tape. I also found a software company, Wild Ginger, who offers a free computer program that creates custom hospital clothing in all sizes!! How wonderful would it be for a child who has to be in the hospital long term to be able to wear comfy jammies in fun fabrics that don't get all bunched up when you move around?!?!
So, I am asking for opinions...do you all think this is a good idea?? I haven't approached any hospitals, etc about it yet, as I still need to make some test pieces. I am just hoping for some honest opinions as to whether or not you all feel this is a good idea or a silly one. Either way, I plan to make some clothes for Hannah's next stay...I am just hoping that maybe I can help some other little people get more comfy too.
Please feel free to post your comments...I look forward to hearing your thoughts and opinions!!!
Cheers!
Sharon

9.21.2009

Baby Goodies!!!


Meet Baxter...he's a friend of Burke Bunny. Baxter was my second go-around with the Susan Anderson Rabbit pattern. I made him as part of a baby shower gift for my friend Cara. I am so excited that her shower was this past weekend, since I have been chomping at the bit to post these photos...both on here and on Ravelry!!!

Hannah is as in love, if not more, with these bunnies as I am, so she has requested a purple one. I have the yarn already, but I think I am going to take a bit of a crafting break for a little while...keep reading and you'll see why!!


Also included in Cara's gift basket
was this little guy. I've named him Little Boy Blue, and he was created using the Presto Chango pattern.
I modified the pattern a bit, since the original had a lace pattern worked into the front panel. I thought it looked a bit to girly, so I stuck with a simple stockinette stitch one instead. I also added a little bear button to dress it up a bit.


This pattern is really cool because you can make multiple front panels for the same sweater. The entire thing unbuttons for easy clean-ups and changes. Pretty cool, huh?? Another bonus is that the entire thing (minus the panel) is made of one piece, so aside from some seaming (which I really don't mind doing), it takes no time at all to work up.
To go along with the sweater, I made a hat and a pair of booties. I am really happy with how everything turned out!!! Now I have to sit back and keep my fingers crossed that everything fits!!!

I wanted to dress up the gift tag a bit, so I personalized it and added some extra buttons and yarn. You never know when one might pop off!!!

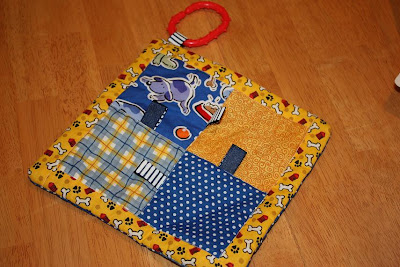
So, I know that this is more of a knitting blog, but I made some sewn items for the basket and I didn't want to leave them out. I created this little tag-quilt out of some dog fabric I've had sitting around for a bit.

My finish work is far from professional, but I don't think it looks too bad!!!

And to match the mini-quilt, I made these three blocks. One has crinkle paper inside, one has bells, and the other makes a rattle noise. They were super easy to make and lots of fun!!!

Here's an artsy-fartsy photo of the finished basket!!

Last, but not least, here's the basket I made up from Hannah. None of it was handmade, but I thought it looked cute, so I wanted to include it.

So, that's it. Cara is really into handmade/recycled items, so I was pretty thrilled that my entire gift was handmade.

I was about to say that I am off to relax while Hannah is napping, but I realized that I have a knitting group on Wednesday and I have nothing on the needles...dang! I almost got away with having a craft-break. Oh well!!!

Have a great week everyone!!!

Cheers!
Sharon